There’s something both empowering and slightly nerve-wracking about hosting your first virtual meeting on a new platform. That first click of the “Start Meeting” button often comes with questions. Will everyone be able to join smoothly? Will my presentation go off without a glitch? Will my participants stay engaged or zone out halfway?
Studio, the cloud-based video conferencing and collaboration platform, was designed to eliminate these doubts and help you run professional, interactive, and seamless meetings right from day one. But like any powerful tool, it’s best used when you understand what it can do. In this beginner’s guide, we’ll walk step by step through preparing, launching, managing, and reviewing your first meeting on Studio, ensuring you make a confident first impression and lay the groundwork for productive future sessions.
Why Your First Meeting on Studio Sets the Tone
Your first meeting on Studio is more than a technical task; it’s a foundational moment that shapes how others perceive your digital presence. Just like a first meeting in a physical boardroom or classroom, your virtual presence, preparedness, and clarity will influence how engaged and trusting your participants feel.
Studio’s design supports professionalism and ease-of-use, but how you navigate its features will either amplify or diminish their impact. If you begin with a lagging microphone, unclear agenda, or last-minute link-sharing, the meeting may start off on the wrong foot. On the flip side, arriving early, having your visuals ready, and using Studio’s built-in engagement tools like chat, shared notes, and breakout rooms will immediately set the tone for productive interaction. In many ways, mastering the basics in your first session ensures every meeting after that becomes even easier and more effective.
1. Pre‑Meeting Checklist: Setting Up for Success
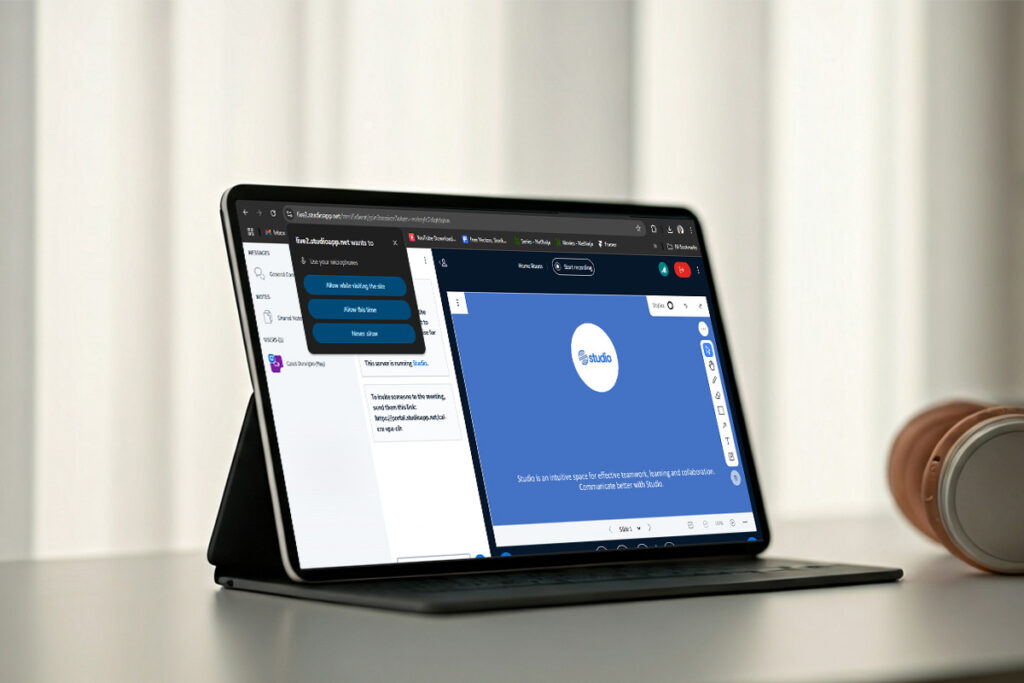
Before you hit Start on your first meeting on Studio, run through a quick readiness check. Think of it as giving your virtual boardroom a quick sweep so nothing distracts from the conversation.
Connectivity and hardware
- Confirm your internet is stable by running a speed test and closing bandwidth‑hungry apps.
- Plug in (or fully charge) your laptop, headset, and webcam. No one wants a battery warning mid‑sentence.
- Choose a quiet, well‑lit space and preview your camera feed for framing.
Customize meeting settings
- Decide whether guests can enter before you: toggle the waiting‑room option if you want to greet everyone personally.
- Switch on automatic recording if this virtual meeting walkthrough will become reference material later.
- Set participant roles: Studio allows you to assign co‑hosts, who can help with screen shares and breakout rooms during your online meeting with Studio.
Content readiness
- With Studio, you can pre-upload presentation slides or documents. Also ensure to keep sites meant for screensharing open in separate tabs, less fumbling, more flow.
- Add a short agenda slide so attendees see structure from the first second.
2. How to Schedule and Invite Attendees for Your First Meeting
Scheduling your first meeting on Studio is simple and intuitive. Click “Schedule Meeting” on your dashboard. You’ll be prompted to enter details such as the meeting title, date, time, short description, and the email addresses of your participants. Studio will generate a join link that you can copy and share.
Studio integrates easily with popular calendar tools like Google Calendar and Outlook. This means you can send invites directly, complete with meeting links and calendar reminders, so nobody misses a beat.
3. During the Meeting: Managing Tools and Engagement
The big moment arrives, you launch your first meeting on Studio and see faces pop into the gallery view. Keep energy high with built‑in features that make interaction effortless.
Screen sharing and external video
If you want to share your screen, a browser tab, or the entire desktop, navigate to the ‘Share your screen’ button, it’s between the webcam icon and reactions bar. But if you plan to show a Vimeo, Instructure Media, Twitch or Dailymotion clip, click on ‘External Video’, you’ll find it when you click the Action+ menu button and everyone in the meeting can watch together.
Interactive workspaces
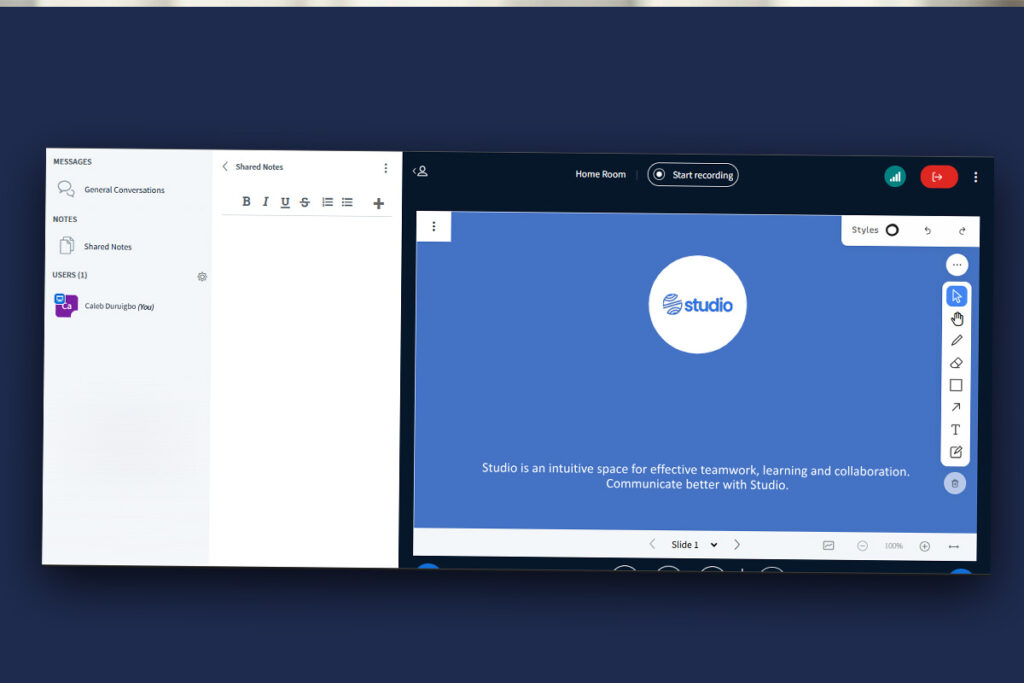
- Shared Notes: Studio includes a shared notes feature that allows everyone in the meeting to contribute to a central notepad. This encourages real-time collaboration and ensures key takeaways, action points, or ideas are documented as the meeting unfolds. You can export this Shared Notes as Export current pad as: Etherpad, HTML, Plain text, Microsoft Word, PDF and ODF (Open Document Format).
- Interactive Whiteboard: feature transforms your virtual meeting space into a live canvas where ideas come to life visually. It’s more than just a drawing tool; it’s a collaborative hub. You can sketch out workflows, create mind maps, annotate screenshots, or visually organize thoughts as discussions evolve. Whether you’re teaching a concept, leading a team brainstorm, or mapping out project timelines, the Whiteboard makes abstract ideas concrete and keeps everyone visually aligned in real time.
- Breakout Rooms: Breakout Rooms allow you to divide your participants into smaller, focused groups for deeper collaboration. With just a few clicks, you can assign attendees manually or automatically, set timers for discussion, and broadcast messages to all rooms at once. It’s perfect for workshops, group projects, or side discussions.
Real‑time feedback loops
Polls, emoji reactions, and chat prompts keep attention on you rather than on inboxes. Ask a quick multiple‑choice question every ten minutes to measure understanding. These small nudges transform a passive lecture into an engaging virtual meeting walkthrough.
4. Common Issues and Quick Fixes for First‑Time Hosts
Even with the best preparation, a few technical hiccups can happen,especially when you’re running your first meeting on Studio. The good news is most of these issues are easy to fix in real time once you know what to look out for.
Echo or audio feedback is often caused by having multiple audio inputs open, say, your laptop and phone connected at the same time. To fix this, mute one device or plug in a headset to isolate the audio source.
Frozen video or lagging visuals usually signal a weak internet connection. With Studio, you can check your connection status to see network strength on your device. If possible, switch to a wired connection or close background applications that are using bandwidth. You can also lower the video resolution in Studio to stabilize the stream. Did you know that as a host, you can see the network status of all attendees? Great, right?
For persistent issues, you can reach out to Studio support team.
5. Post‑Meeting: Reviewing Performance with Studio Analytics

Once your first meeting on Studio ends, the real value begins. Studio’s Analytics Dashboard gives you a comprehensive breakdown of how the session went, so you’re not just guessing, you’re improving with every interaction.
Session Overview at a Glance
Studio automatically captures essential metrics like:
- Duration: Total length of the meeting, down to the second (e.g., 00:19:29)
- Number of Active Users
- Activity Score: A cumulative engagement rating based on participation
- Poll Responses: See how participants answered in-meeting polls
- Engagement Timeline: Visualize spikes and drops in activity throughout the session
Individual User Metrics
Dive deeper into how each participant interacted with the session. For every attendee, you can see online time, talk time, webcam time, emojis used, hands raised, activity score and status.
This level of insight helps you identify your most engaged attendees, understand what content resonated, and refine your approach for future meetings. Whether you’re an educator tracking student participation or a team lead measuring collaboration, Studio equips you with the data you need to grow. Want to take it further? You can export the data from the analytics dashboard. The more you review, the better your online meetings with Studio will become.
Ready to have better meetings and smarter collaborations? Dive deeper on the Studio homepage or reach out to our team via the contact page to discuss. Keep experimenting, keep iterating, and you’ll soon be hosting meetings on Studio that feel less like video calls and more like dynamic, in‑person collaborations, minus the commute.
